如果我们可以在调用函数时拿到当前调用堆栈,就可以取到一系列想要的数据。
一、思考
做 iOS 开发的同学都知道,我们在平时开发过程中,经常会用到非常实用的自定义打印功能,方便我们快速定位是在哪个控制器,哪一行代码。
在 OC 和 Swift 中都可以很轻松实现,因为系统本来就提供了用于日志输出的预处理宏,只要我们拿来拼接就可以了,这里以 Swift 的打印为例:
1 | enum LogType: String { |
使用及打印结果:
1 | log.debug("models count -- \(models.count)") |
OC 和 Swift 的预处理宏对应表
| OC | Swift | |
|---|---|---|
| __FILE__ | #file | 打印当前文件路径 |
| __LINE__ | #line | 打印当前行号,整数 |
| __FUNCTION__ | #function | 打印当前函数或方法 |
但是在 Dart 中并没有提供这些功能,但是这个功能对我们来说确实又非常需要,那有什么办法实现它呢?
🤔
我们回想在开发过程中,是不是发现只要一不小心抛异常,就可以看到类似如下的打印内容,而且还能清楚的知道异常是在哪个文件和哪一行的代码造成的。
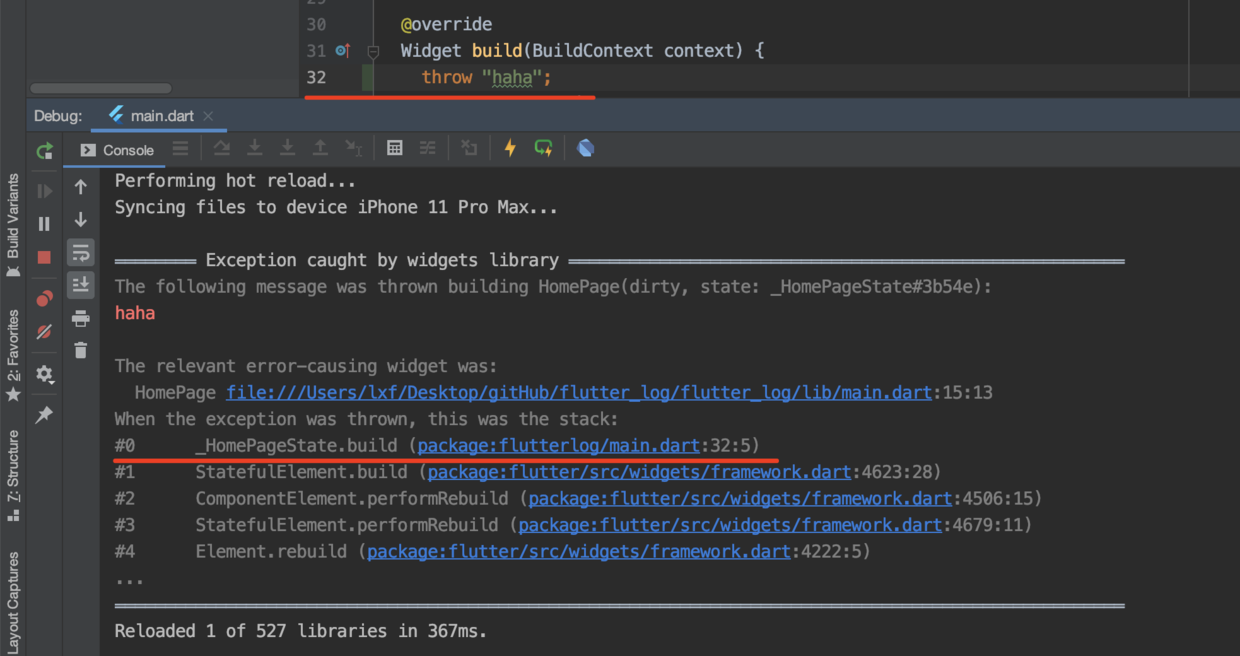
所以如果我们可以在调用函数时拿到当前调用堆栈,就可以取到一系列想要的数据。
二、实践
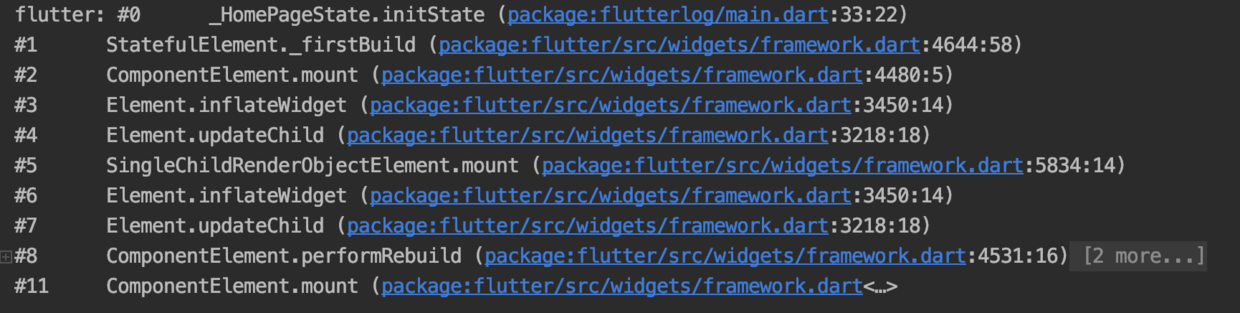
在 dart:core 中提供了 堆栈跟踪(StackTrace),可以通过 StackTrace.current 取到当前的堆栈信息,打印如下图所示,会发现这不好拿到我们想要的信息。
这里我用到了官方开发的一个包 stack_trace,它可以将堆栈信息变得更多人性化,并方便我们查看堆栈信息和获取想要的数据。
ps: stack_trace 在 Flutter 环境下直接导包即可使用,而在纯 Dart 下需要将其添加为依赖于pubspec.yaml中。
1 | dependencies: |
那下面我们来试试 stack_trace 的威力吧1
2
3
4
5
6
7
8import 'package:stack_trace/stack_trace.dart';
// 将 StackTrace 对象转换成 Chain 对象
// 当然,这里也可以直接用 Chain.current();
// final chain = Chain.current();
final chain = Chain.forTrace(StackTrace.current);
print(chain);
打印内容:
1 | flutter: package:flutter_test1/main.dart 79:17 _MyHomePageState.test_print |
工具代码雏形:
1 | import 'package:stack_trace/stack_trace.dart'; |
Frame 类的属性
1 | /// A single stack frame. Each frame points to a precise location in Dart code. |
uri: 获取代码所在文件的路径line: 获取代码所在行member: 获取所在方法
打印看一下 :
1 | // uri |
三、呈上代码
下面我做了一点封装,直接拿走即可使用,完整的代码和示例请到GitHub上【查看】。
代码:1
2
3
4
5
6
7
8
9
10
11
12
13
14
15
16
17
18
19
20
21
22
23
24
25
26
27
28
29
30
31
32
33
34
35
36
37
38
39
40
41
42
43
44// log.dart
enum FLogMode {
debug, // 💚 DEBUG
warning, // 💛 WARNING
info, // 💙 INFO
error, // ❤️ ERROR
}
void FLog(dynamic msg, { FLogMode mode = FLogMode.debug }) {
if (kReleaseMode) { // release模式不打印
return;
}
var chain = Chain.current(); // Chain.forTrace(StackTrace.current);
// 将 core 和 flutter 包的堆栈合起来(即相关数据只剩其中一条)
chain = chain.foldFrames((frame) => frame.isCore || frame.package == "flutter");
// 取出所有信息帧
final frames = chain.toTrace().frames;
// 找到当前函数的信息帧
final idx = frames.indexWhere((element) => element.member == "FLog");
if (idx == -1 || idx+1 >= frames.length) {
return;
}
// 调用当前函数的函数信息帧
final frame = frames[idx+1];
var modeStr = "";
switch(mode) {
case FLogMode.debug:
modeStr = "💚 DEBUG";
break;
case FLogMode.warning:
modeStr = "💛 WARNING";
break;
case FLogMode.info:
modeStr = "💙 INFO";
break;
case FLogMode.error:
modeStr = "❤️ ERROR";
break;
}
print("$modeStr ${frame.uri.toString().split("/").last}(${frame.line}) - $msg ");
}
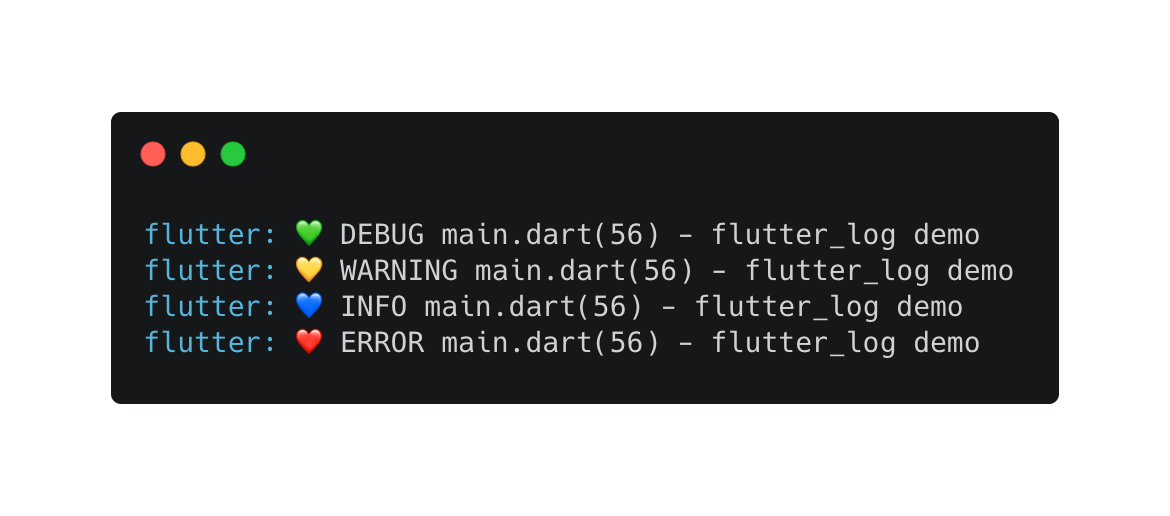
四、使用
1 | // 直接使用FLog |
打印效果如下所示: